Day: September 26, 2018
User parameters in PhysiCell
As of release 1.4.0, users can add any number of Boolean, integer, double, and string parameters to an XML configuration file. (These are stored by default in ./config/. The default parameter file is ./config/PhysiCell_settings.xml.) These parameters are automatically parsed into a parameters data structure, and accessible throughout a PhysiCell project.
This tutorial will show you the key techniques to use these features. (See the User_Guide for full documentation.) First, let’s create a barebones 2D project by populating the 2D template project. In a terminal shell in your root PhysiCell directory, do this:
make template2D
We will use this 2D project template for the remainder of the tutorial. We assume you already have a working copy of PhysiCell installed, version 1.4.0 or later. (If not, visit the PhysiCell tutorials to find installation instructions for your operating system.)
User parameters in the XML configuration file
Next, let’s look at the parameter file. In your text editor of choice, open up ./config/PhysiCell_settings.xml, and browse down to <user_parameters>, which will have some sample parameters from the 2D template project.
	<user_parameters>
		<random_seed type="int" units="dimensionless">0</random_seed>
		<!-- example parameters from the template -->

		<!-- motile cell type parameters -->
		<motile_cell_persistence_time type="double" units="min">15</motile_cell_persistence_time>
		<motile_cell_migration_speed type="double" units="micron/min">0.5</motile_cell_migration_speed>
		<motile_cell_relative_adhesion type="double" units="dimensionless">0.05</motile_cell_relative_adhesion>
		<motile_cell_apoptosis_rate type="double" units="1/min">0.0</motile_cell_apoptosis_rate>
		<motile_cell_relative_cycle_entry_rate type="double" units="dimensionless">0.1</motile_cell_relative_cycle_entry_rate>
	</user_parameters>
Notice a few trends:
- Each XML element (tag) under <user_parameters> is a user parameter, whose name is the element name.
- Each variable requires an attribute named “type”, with one of the following four values:
- bool for a Boolean parameter
- int for an integer parameter
- double for a double (floating point) parameter
- string for text string parameter
While we do not encourage it, if no valid type is supplied, PhysiCell will attempt to interpret the parameter as a double.
- Each variable here has an (optional) attribute “units”. PhysiCell does not convert units, but these are helpful for clarity between users and developers. By default, PhysiCell uses minutes for all time units, and microns for all spatial units.
- Then, between the tags, you list the value of your parameter.
Let’s add the following parameters to the configuration file:
- A string parameter called motile_color that sets the color of the motile_cell type in SVG outputs. Please refer to the User Guide (in the documentation folder) for more information on allowed color formats, including rgb values and named colors. Let’s use the value darkorange.
- A double parameter called base_cycle_entry_rate that will give the rate of entry to the S cycle phase from the G1 phase for the default cell type in the code. Let’s use a ridiculously high value of 0.01 min-1.
- A double parameter called base_apoptosis_rate for the default cell type. Let’s set the value at 1e-7 min-1.
- A double parameter that sets the (relative) maximum cell-cell adhesion sensing distance, relative to the cell’s radius. Let’s set it at 2.5 (dimensionless). (The default is 1.25.)
- A bool parameter that enables or disables placing a single motile cell in the initial setup. Let’s set it at true.
If you edit the <user_parameters> to include these, it should look like this:
	<user_parameters>
		<random_seed type="int" units="dimensionless">0</random_seed>
		<!-- example parameters from the template -->

		<!-- motile cell type parameters -->
		<motile_cell_persistence_time type="double" units="min">15</motile_cell_persistence_time>
		<motile_cell_migration_speed type="double" units="micron/min">0.5</motile_cell_migration_speed>
		<motile_cell_relative_adhesion type="double" units="dimensionless">0.05</motile_cell_relative_adhesion>
		<motile_cell_apoptosis_rate type="double" units="1/min">0.0</motile_cell_apoptosis_rate>
		<motile_cell_relative_cycle_entry_rate type="double" units="dimensionless">0.1</motile_cell_relative_cycle_entry_rate>

		<!-- for the tutorial -->
		<motile_color type="string" units="dimensionless">darkorange</motile_color>

		<base_cycle_entry_rate type="double" units="1/min">0.01</base_cycle_entry_rate>
		<base_apoptosis_rate type="double" units="1/min">1e-7</base_apoptosis_rate>
		<base_cell_adhesion_distance type="double" units="dimensionless">2.5</base_cell_adhesion_distance>

		<include_motile_cell type="bool" units="dimensionless">true</include_motile_cell>
	</user_parameters>
Viewing the loaded parameters
Let’s compile and run the project.
make
./project2D
At the beginning of the simulation, PhysiCell parses the <user_parameters> block into a global data structure called parameters, with sub-parts bools, ints, doubles, and strings. It displays these loaded parameters at the start of the simulation. Here’s what it looks like:
shell$  ./project2D
Using config file ./config/PhysiCell_settings.xml ...
User parameters in XML config file:
Bool parameters::
include_motile_cell: 1 [dimensionless]

Int parameters::
random_seed: 0 [dimensionless]

Double parameters::
motile_cell_persistence_time: 15 [min]
motile_cell_migration_speed: 0.5 [micron/min]
motile_cell_relative_adhesion: 0.05 [dimensionless]
motile_cell_apoptosis_rate: 0 [1/min]
motile_cell_relative_cycle_entry_rate: 0.1 [dimensionless]
base_cycle_entry_rate: 0.01 [1/min]
base_apoptosis_rate: 1e-007 [1/min]
base_cell_adhesion_distance: 2.5 [dimensionless]

String parameters::
motile_color: darkorange [dimensionless]
Getting parameter values
Within a PhysiCell project, you can access the value of any parameter by either its index or its name, so long as you know its type. Here’s an example of accessing the base_cell_adhesion_distance by its name:
/* this directly accesses the value of the parameter */
double temp = parameters.doubles( "base_cell_adhesion_distance" );
std::cout << temp << std::endl;

/* this streams a formatted output including the parameter name and units */
std::cout << parameters.doubles[ "base_cell_adhesion_distance" ] << std::endl;

std::cout << parameters.doubles["base_cell_adhesion_distance"].name << " "
     << parameters.doubles["base_cell_adhesion_distance"].value << " "
     << parameters.doubles["base_cell_adhesion_distance"].units << std::endl;
Notice that accessing by () gets the value of the parameter in a user-friendly way, whereas accessing by [] gets the entire parameter, including its name, value, and units.
You can more efficiently access the parameter by first finding its integer index, and accessing by index:
/* this directly accesses the value of the parameter */
int my_index = parameters.doubles.find_index( "base_cell_adhesion_distance" );
double temp = parameters.doubles( my_index );
std::cout << temp << std::endl;

/* this streams a formatted output including the parameter name and units */
std::cout << parameters.doubles[ my_index ] << std::endl;

std::cout << parameters.doubles[ my_index ].name << " "
     << parameters.doubles[ my_index ].value << " "
     << parameters.doubles[ my_index ].units << std::endl;
Similarly, we can access string and Boolean parameters. For example:
if( parameters.bools("include_motile_cell") == true )
{ std::cout << "I shall include a motile cell." << std::endl; }

int rand_ind = parameters.ints.find_index( "random_seed" );
std::cout << parameters.ints[rand_ind].name << " is at index " << rand_ind << std::endl;

std::cout << "We'll use this nice color: " << parameters.strings( "motile_color" );
Using the parameters in custom functions
Let’s use these new parameters when setting up the parameter values of the simulation. For this project, all custom code is in ./custom_modules/custom.cpp. Open that source file in your favorite text editor. Look for the function called “create_cell_types“. In the code snipped below, we access the parameter values to set the appropriate parameters in the default cell definition, rather than hard-coding them.
	// add custom data here, if any

	/* for the tutorial */
	cell_defaults.phenotype.cycle.data.transition_rate(G0G1_index,S_index) =
		parameters.doubles("base_cycle_entry_rate");
	cell_defaults.phenotype.death.rates[apoptosis_model_index] =
		parameters.doubles("base_apoptosis_rate");

	cell_defaults.phenotype.mechanics.set_relative_maximum_adhesion_distance(
		parameters.doubles("base_cell_adhesion_distance") );
Next, let’s change the tissue setup (“setup_tissue“) to check our Boolean variable before placing the initial motile cell.
     // now create a motile cell
     /*  remove this conditional for the normal project */
     if( parameters.bools("include_motile_cell") == true )
     {
           pC = create_cell( motile_cell );
           pC->assign_position( 15.0, -18.0, 0.0 );
     }
Lastly, let’s make use of the string parameter to change the plotting. Search for my_coloring_function and edit the source file to use the new color:
	// if the cell is motile and not dead, paint it black

	static std::string motile_color = parameters.strings( "motile_color" );  // tutorial

	if( pCell->phenotype.death.dead == false && pCell->type == 1 )
	{
		 output[0] = motile_color;
		 output[2] = motile_color;
	}
Notice the static here: We intend to call this function many, many times. For performance reasons, we don’t want to declare a string, instantiate it with motile_color, pass it to parameters.strings(), and then deallocate it once done. Instead, we store the search statically within the function, so that all future function calls will have access to that search result.
And that’s it! Compile your code, and give it a go.
make
./project2D
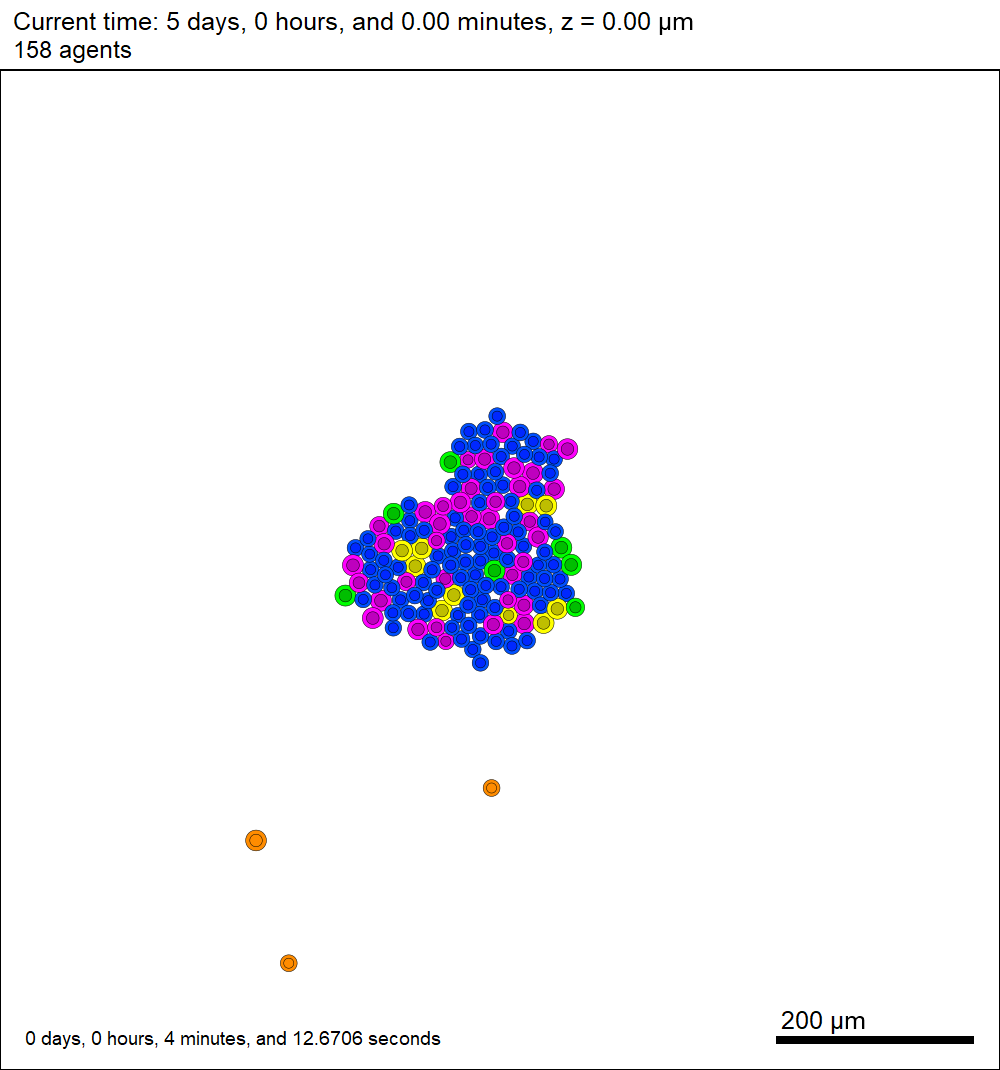
This should create a lot of data in the ./output directory, including SVG files that color motile cells as darkorange, like this one below.
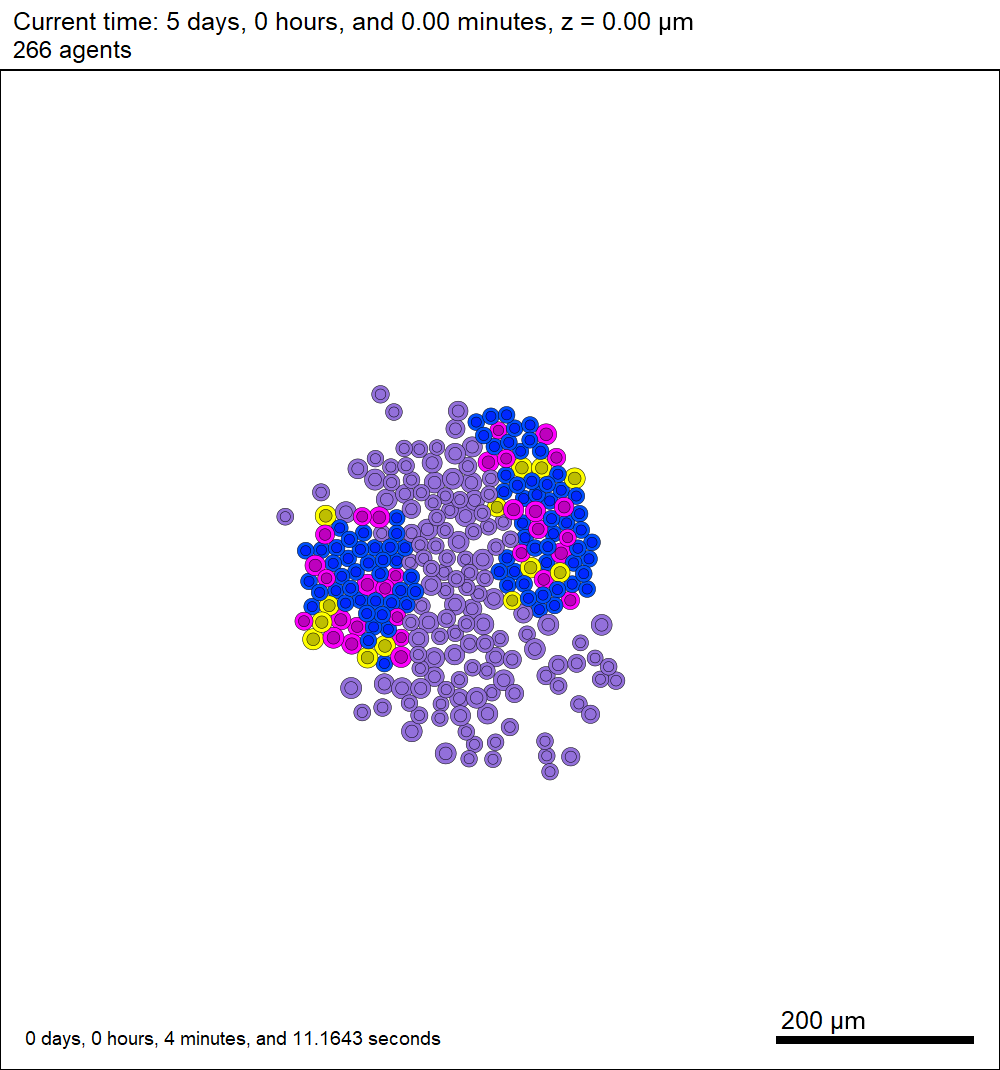
Now that this project is parsing the XML file to get parameter values, we don’t need to recompile to change a model parameter. For example, change motile_color to mediumpurple, set motile_cell_migration_speed to 0.25, and set motile_cell_relative_cycle_entry_rate to 2.0. Rerun the code (without compiling):
./project2D
And let’s look at the change in the final SVG output (output00000120.svg):
More notes on configuration files
You may notice other sections in the XML configuration file. I encourage you to explore them, but the meanings should be evident: you can set the computational domain size, the number of threads (for OpenMP parallelization), and how frequently (and where) data are stored. In future PhysiCell releases, we will continue adding more and more options to these XML files to simplify setup and configuration of PhysiCell models.