Category: gcc
Adding a directory to your Windows path
When you’re setting your BioFVM / PhysiCell g++ development environment, you’ll need to add the compiler, MSYS, and your text editor (like Notepad++) to your system path. For example, you may need to add folders like these to your system PATH variable:
- c:\Program Files\mingw-w64\x86_64-5.3.0-win32-seh-rt_v4_rev0\mingw64\bin\
- c:\Program Files (x86)\Notepad++\
- C:\MinGW\msys\1.0\bin\
Here’s how to do that in various versions of Windows.
Windows XP, 7, and 8
First, open up a text editor, and concatenate your three paths into a single block of text, separated by semicolons (;):
- Open notepad ([Windows]+R, notepad)
- Type a semicolon, paste in the first path, and append a semicolon. It should look like this:
;c:\Program Files\mingw-w64\x86_64-5.3.0-win32-seh-rt_v4_rev0\mingw64\bin\;
- Paste in the next path, and append a semicolon. It should look like this:
;c:\Program Files\mingw-w64\x86_64-5.3.0-win32-seh-rt_v4_rev0\mingw64\bin\;C:\Program Files (x86)\Notepad++\;
- Paste in the last path, and append a semicolon. It should look something like this:
;c:\Program Files\mingw-w64\x86_64-5.3.0-win32-seh-rt_v4_rev0\mingw64\bin\;C:\Program Files (x86)\Notepad++\;c:\MinGW\msys\1.0\bin\;
Lastly, add these paths to the system path:
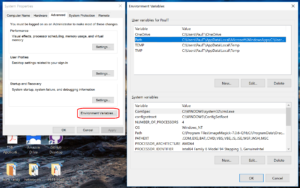
- Go the Start Menu, the right-click “This PC” or “My Computer”, and choose “Properties.”
- Click on “Advanced system settings”
- Click on “Environment Variables…” in the “Advanced” tab
- Scroll through the “System Variables” below until you find Path.
- Select “Path”, then click “Edit…”
- At the very end of “Variable Value”, paste what you made in Notepad in the prior steps. Make sure to paste at the end of the existing value, rather than overwriting it!
- Hit OK, OK, and OK to completely exit the “Advanced system settings.”
Windows 10:
Windows 10 has made it harder to find these settings, but easier to edit them. First, let’s find the system path:
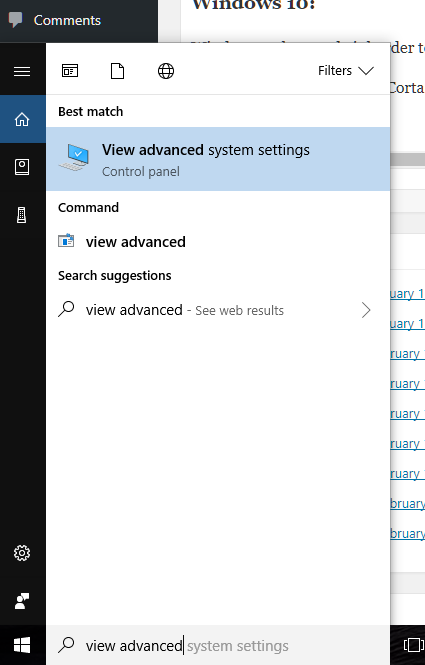
- At the “run / search / Cortana” box next to the start menu, type “view advanced”, and you should see “view advanced system settings” auto-complete:

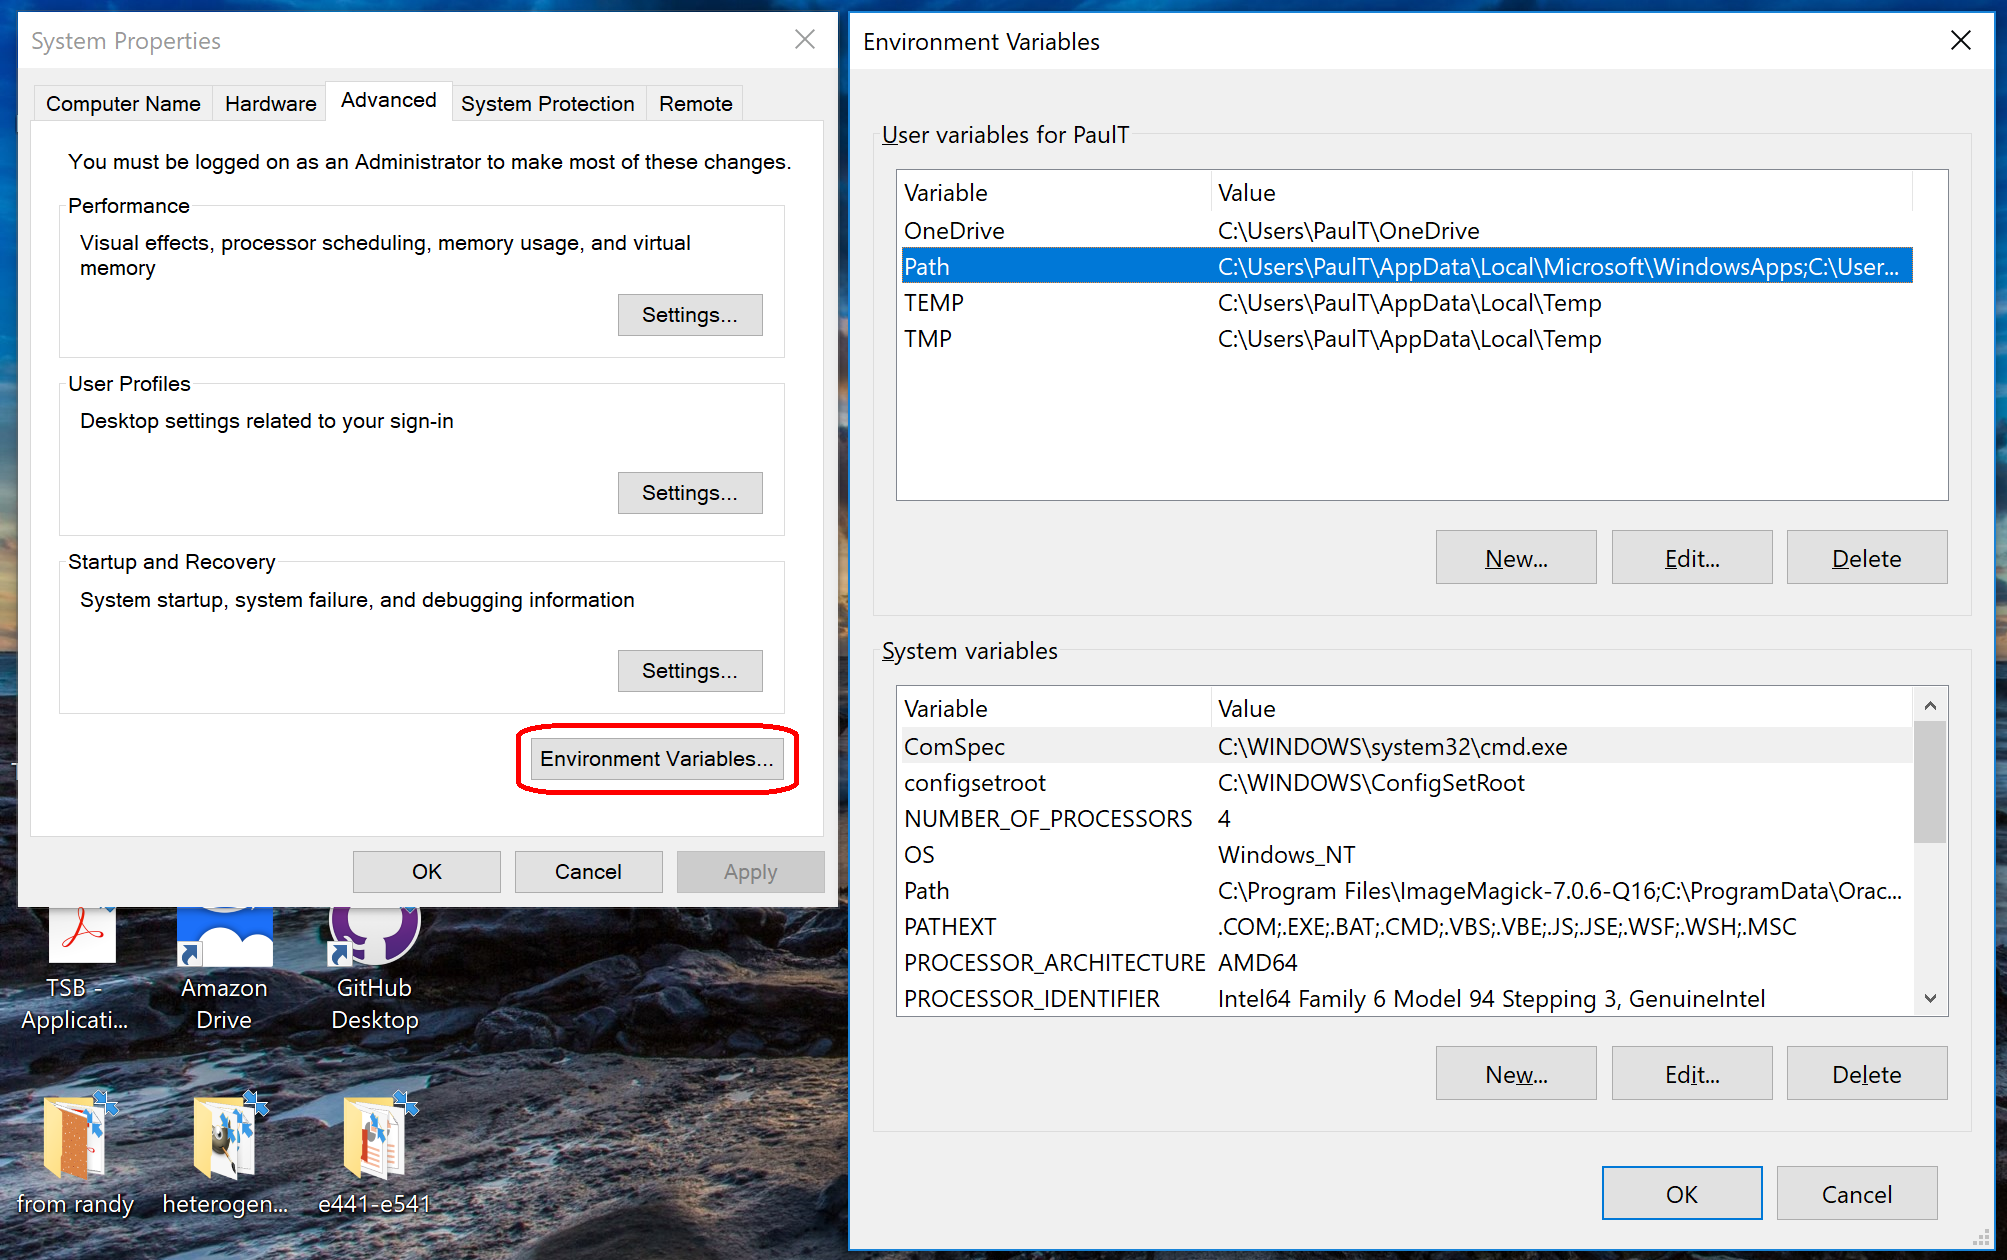
- Click to enter the advanced system settings, then choose environment variables … at the bottom of this box, and scroll down the list of user variables to Path
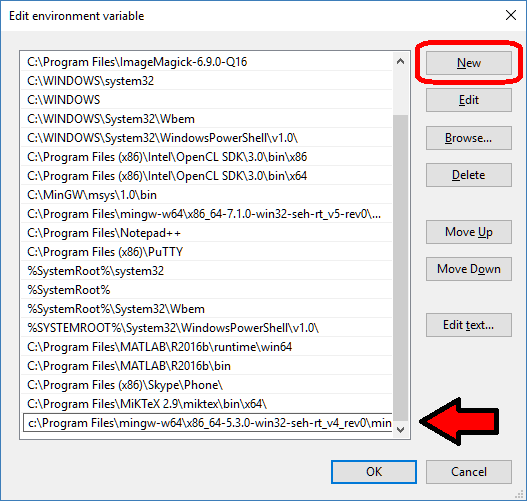
- Click on edit, then click New to add a new path. In the new entry (a new line), paste in your first new path (the compiler):

- Repeat this for the other two paths, then click OK, OK, Apply, OK to apply the new paths and exit.
Getting started with a PhysiCell Virtual Appliance
Note: This is part of a series of “how-to” blog posts to help new users and developers of BioFVM and PhysiCell. This guide is for for users in OSX, Linux, or Windows using the VirtualBox virtualization software to run a PhysiCell virtual appliance.
These instructions should get you up and running without needed to install a compiler, makefile capabilities, or any other software (beyond the virtual machine and the PhysiCell virtual appliance). We note that using the PhysiCell source with your own compiler is still the preferred / ideal way to get started, but the virtual appliance option is a fast way to start even if you’re having troubles setting up your development environment.
What’s a Virtual Machine? What’s a Virtual Appliance?
A virtual machine is a full simulated computer (with its own disk space, operating system, etc.) running on another. They are designed to let a user test on a completely different environment, without affecting the host (main) environment. They also allow a very robust way of taking and reproducing the state of a full working environment.
A virtual appliance is just this: a full image of an installed system (and often its saved state) on a virtual machine, which can easily be installed on a new virtual machine. In this tutorial, you will download our PhysiCell virtual appliance and use its pre-configured compiler and other tools.
What you’ll need:
- VirtualBox: This is a free, cross-platform program to run virtual machines on OSX, Linux, Windows, and other platforms. It is a safe and easy way to install one full operating (a client system) on your main operating system (the host system). For us, this means that we can distribute a fully working Linux environment with a working copy of all the tools you need to compile and run PhysiCell. As of August 1, 2017, this will download Version 5.1.26.
- Download here: https://www.virtualbox.org/wiki/Downloads
- PhysiCell Virtual Appliance: This is a single-file distribution of a virtual machine running Alpine Linux, including all key tools needed to compile and run PhysiCell. As of July 31, 2017, this will download PhysiCell 1.2.2 with g++ 6.3.0.
- Download here: https://sourceforge.net/projects/physicell/files/PhysiCell/
- (Browse to a version of PhysiCell, and download the file that ends in “.ova”.)
- Version 1.2.0: http://bit.ly/2vY51P1 [sf.net]
- Download here: https://sourceforge.net/projects/physicell/files/PhysiCell/
- A computer with hardware support for virtualization: Your CPU needs to have hardware support for virtualization (almost all of them do now), and it has to be enabled in your BIOS. Consult your computer maker on how to turn this on if you get error messages later.
Main steps:
1) Install VirtualBox.
Double-click / open the VirtualBox download. Go ahead and accept all the default choices. If asked, go ahead and download/install the extensions pack.
2) Import the PhysiCell Virtual Appliance
Go the “File” menu and choose “Import Virtual Appliance”. Browse to find the .ova file you just downloaded.
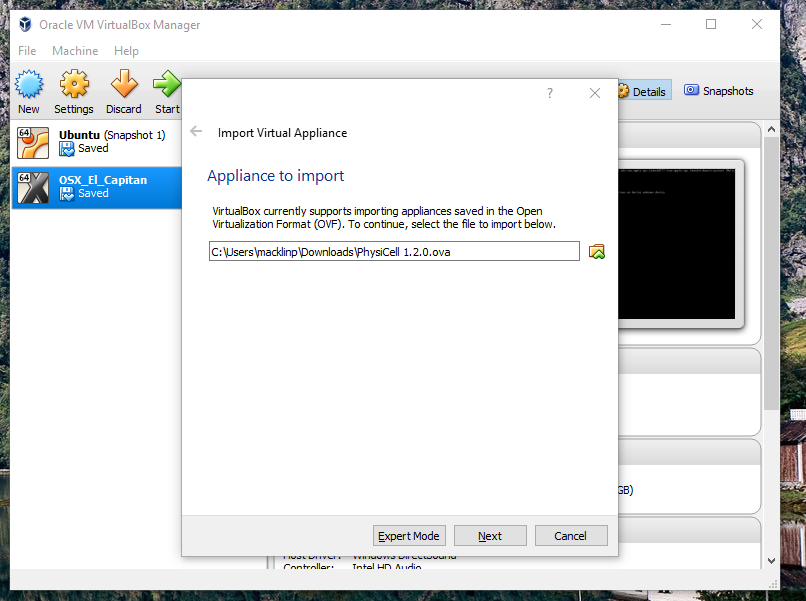
Click on “Next,” and import with all the default options. That’s it!
3) [Optional] Change settings
You most likely won’t need this step, but you can increase/decrease the amount of RAM used for the virtual machine if you select the PhysiCell VM, click the Settings button (orange gear), and choose “System”: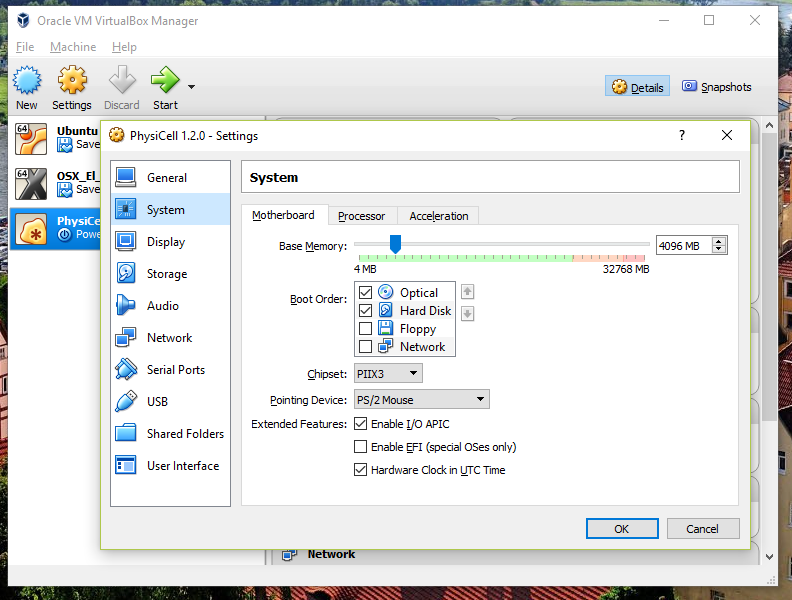 We set the Virtual Machine to have 4 GB of RAM. If you have a machine with lots of RAM (16 GB or more), you may want to set this to 8 GB.
Also, you can choose how many virtual CPUs to give to your VM: 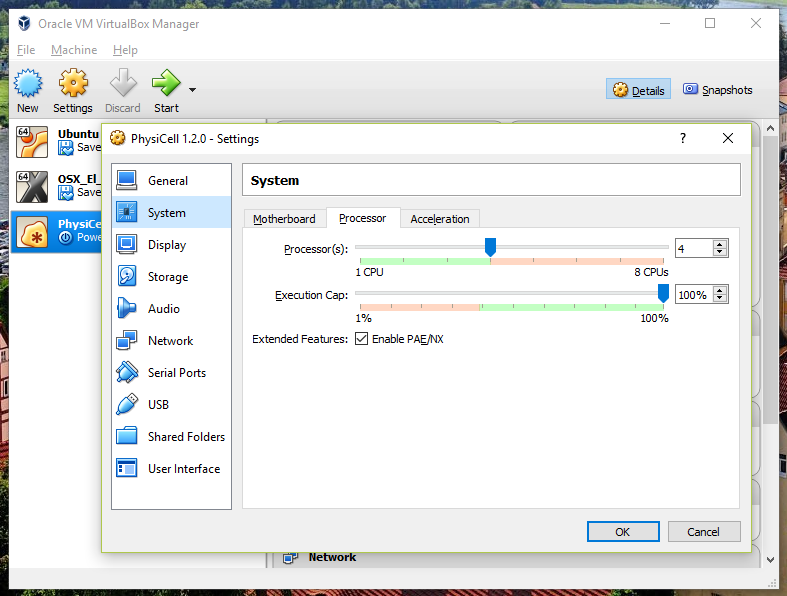
We selected 4 when we set up the Virtual Appliance, but you should match the number of physical processor cores on your machine. In my case, I have a quad core processor with hyperthreading. This means 4 real cores, 8 virtual cores, so I select 4 here.
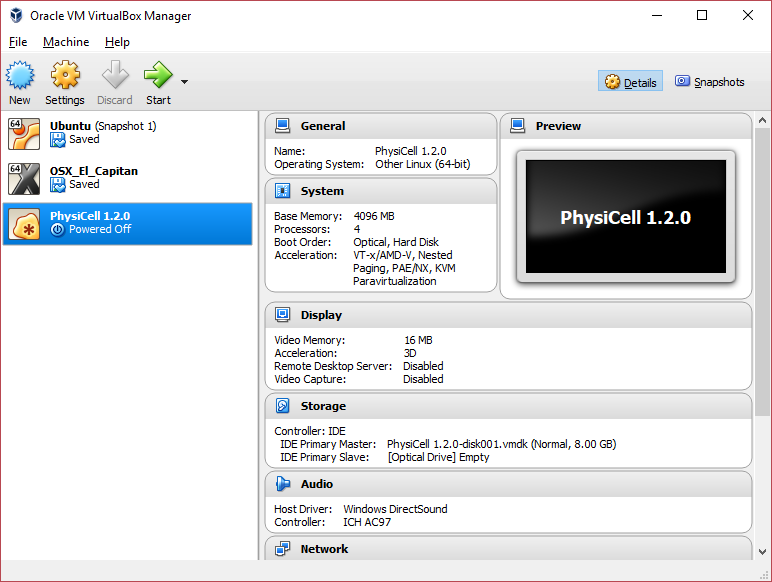
4) Start the Virtual Machine and log in
Select the PhysiCell machine, and click the green “start” button. After the virtual machine boots (with the good old LILO boot manager that I’ve missed), you should see this: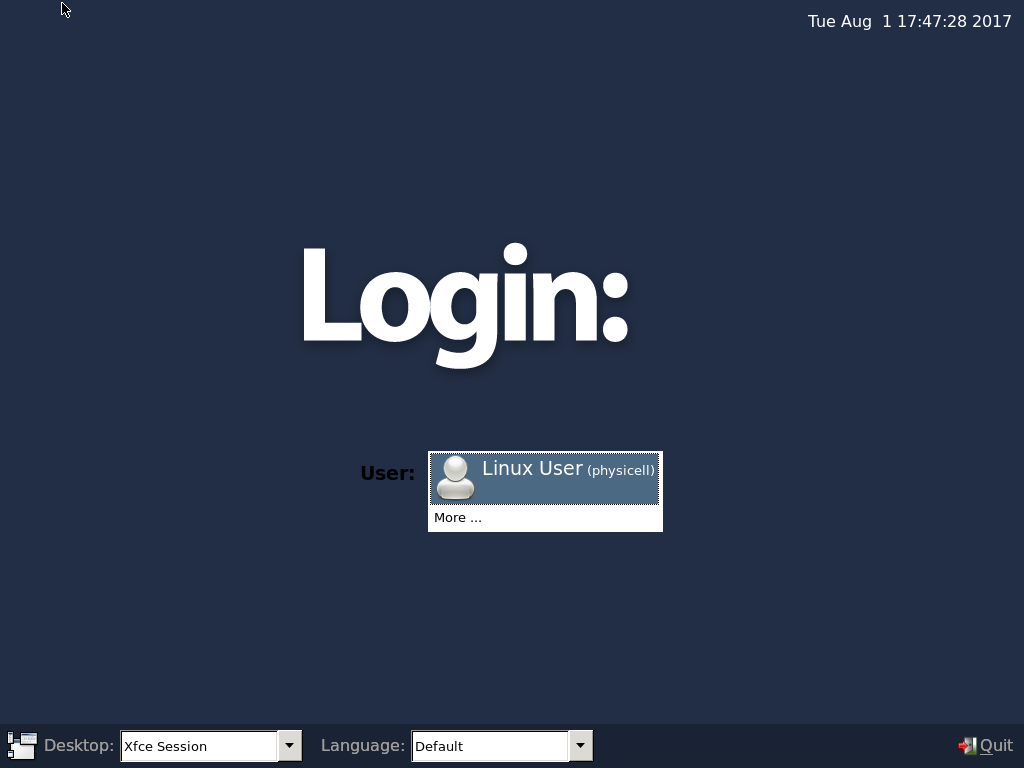
Click the "More ..." button, and log in with username: physicell, password: physicell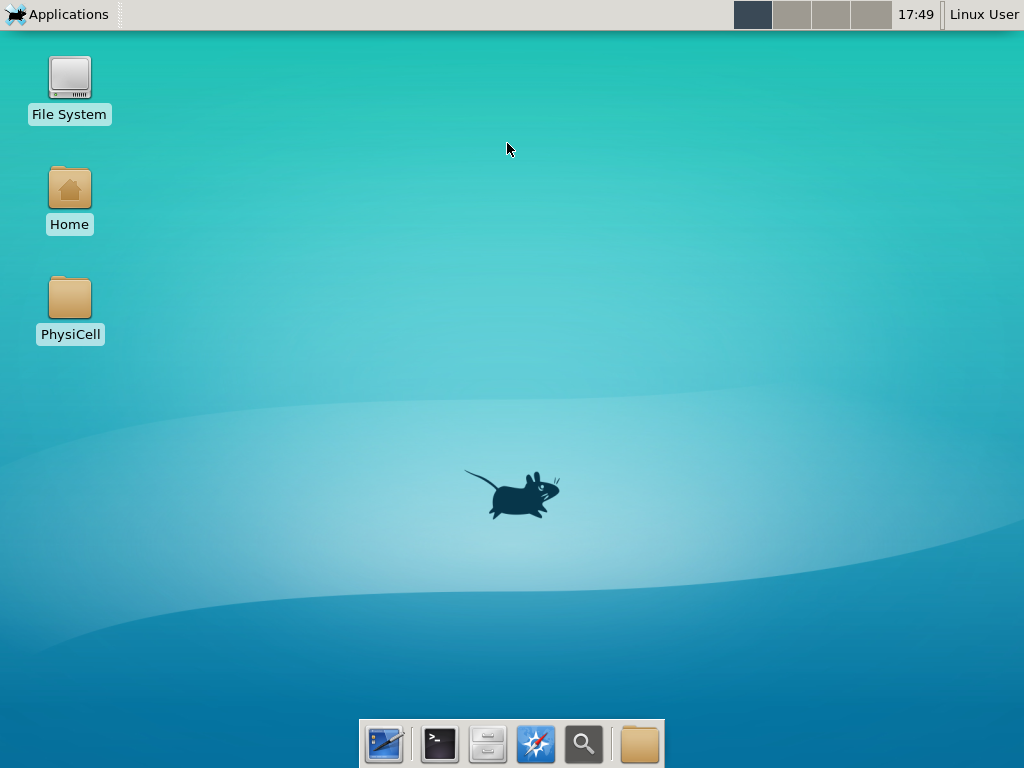
5) Test the compiler and run your first simulation
Notice that PhysiCell is already there on the desktop in the PhysiCell folder. Right-click, and choose “open terminal here.” You’ll already be in the main PhysiCell root directory. 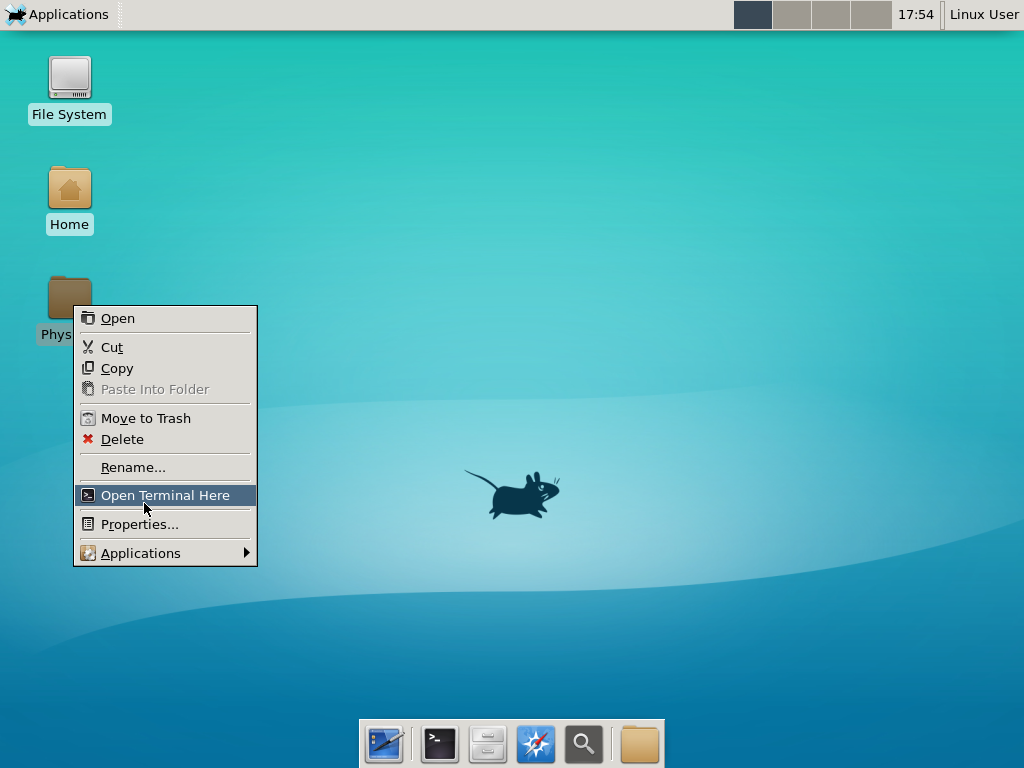
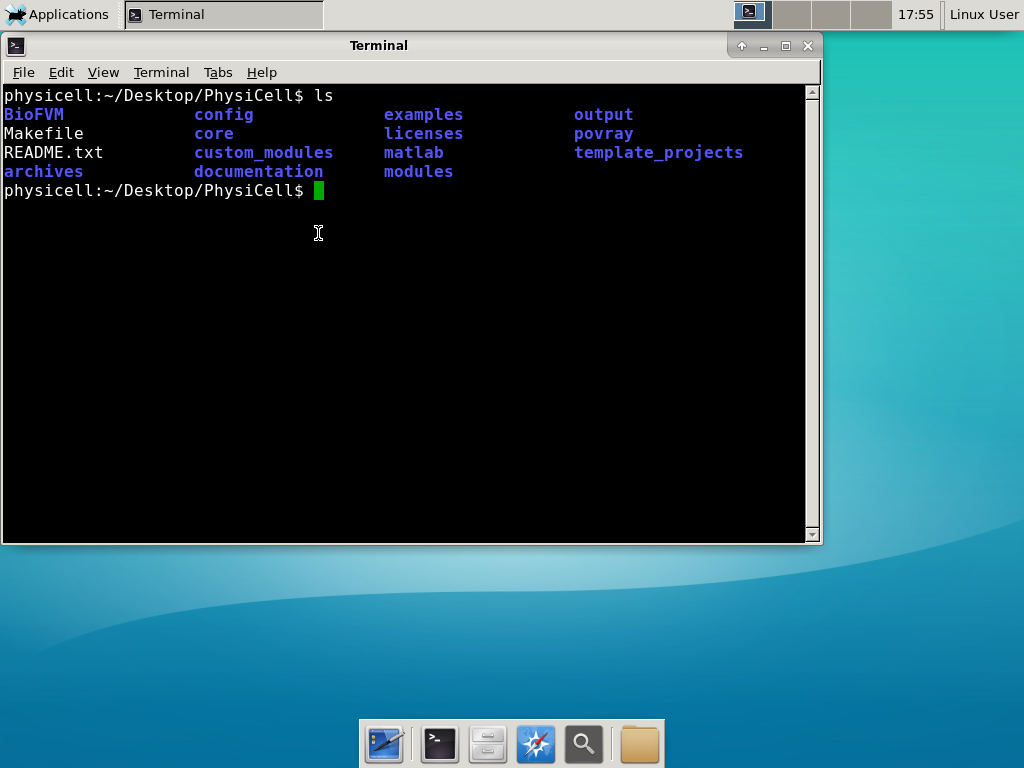
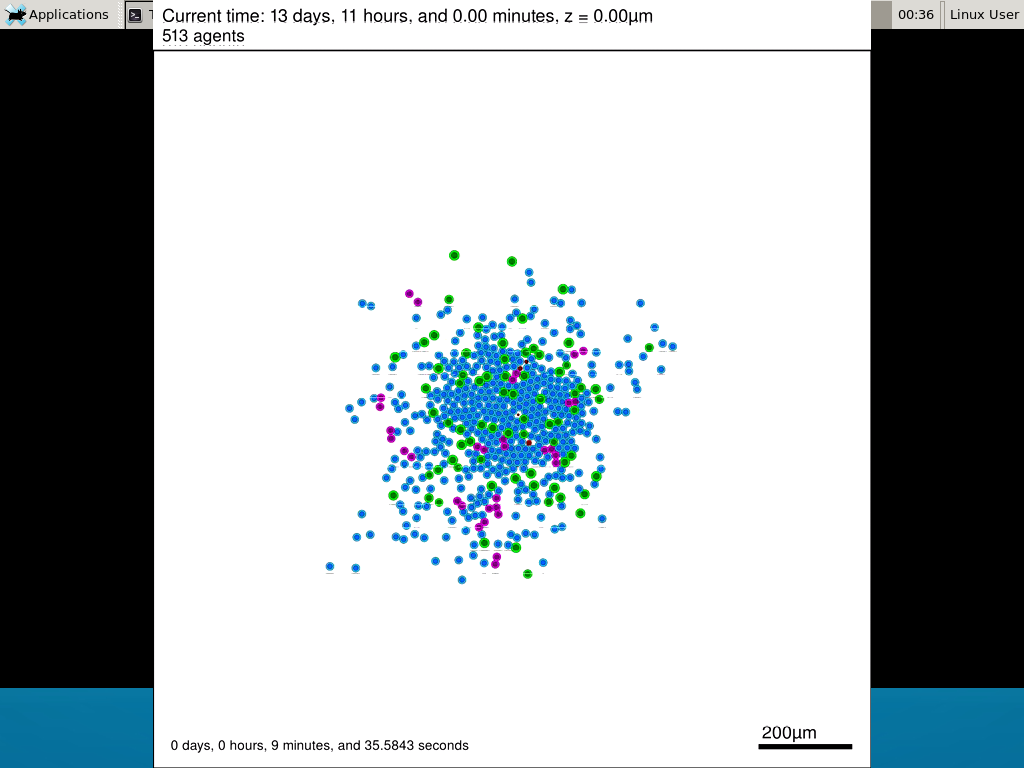
Now, let’s compile your first project! Type “make template2D && make”  And run your project! Type “./project” and let it go!
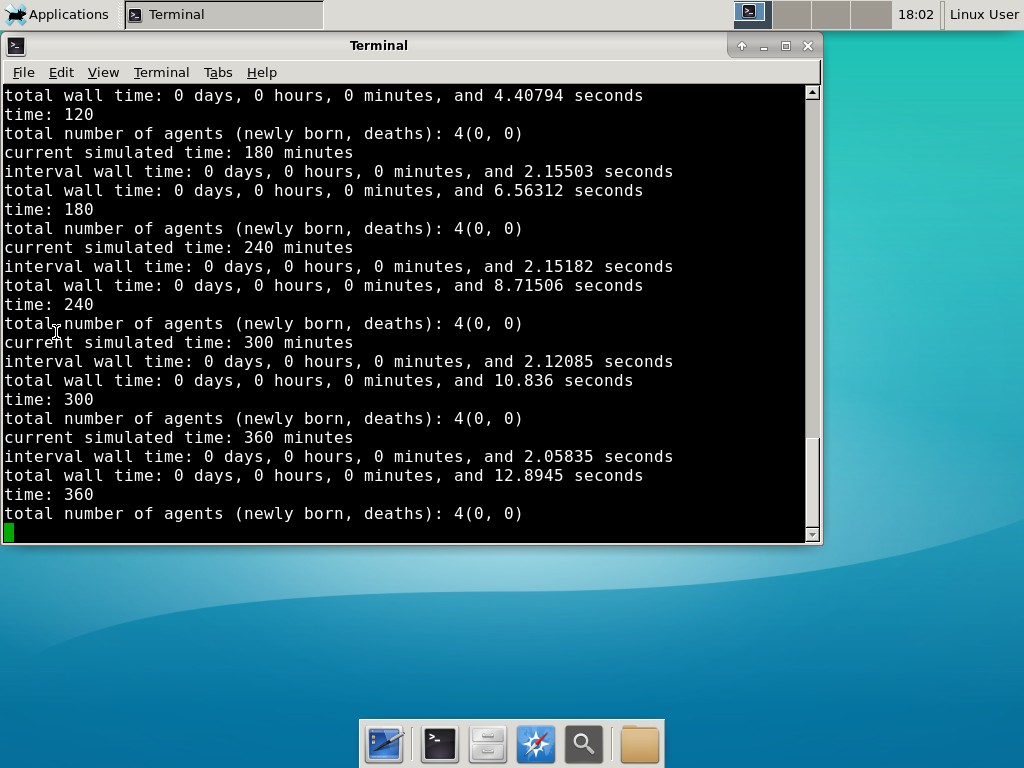 Go ahead and run either the first few days of the simulation (until about 7200 minutes), then hit <control>-C to cancel out. Or run the whole simulation–that’s fine, too.
6) Look at the results
We bundled a few tools to easily look at results. First, ristretto is a very fast image viewer. Let’s view the SVG files: 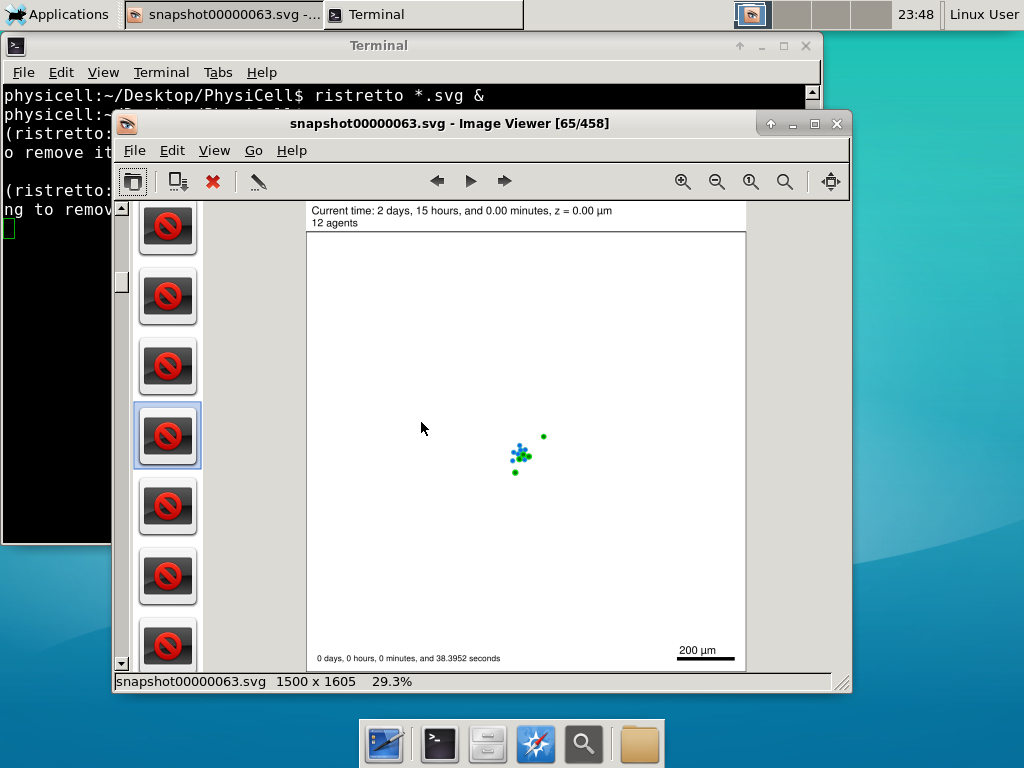 As a nice tip, you can press the left and right arrows to advance through the SVG images, or hold the right arrow down to advance through quickly.
Now, let’s use ImageMagick to convert the SVG files into JPG file: call “magick mogrify -format jpg snap*.svg”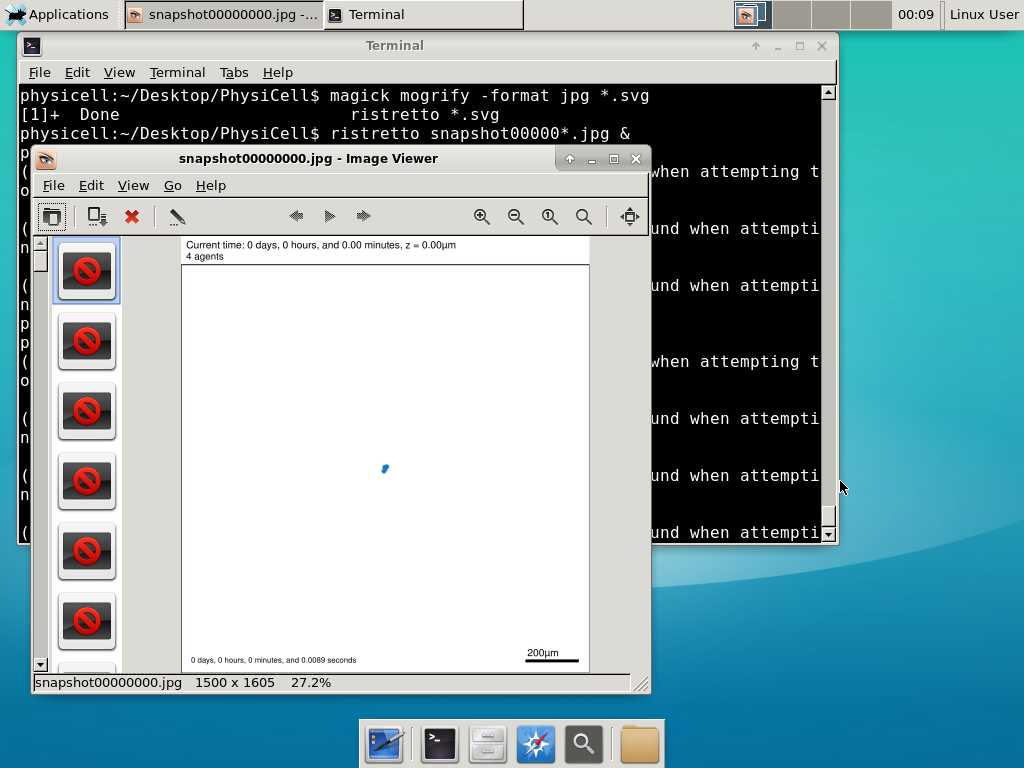
Next, let’s turn those images into a movie. I generally create moves that are 24 frames pers se, so that 1 second of the movie is 1 hour of simulations time. We’ll use mencoder, with options below given to help get a good quality vs. size tradeoff: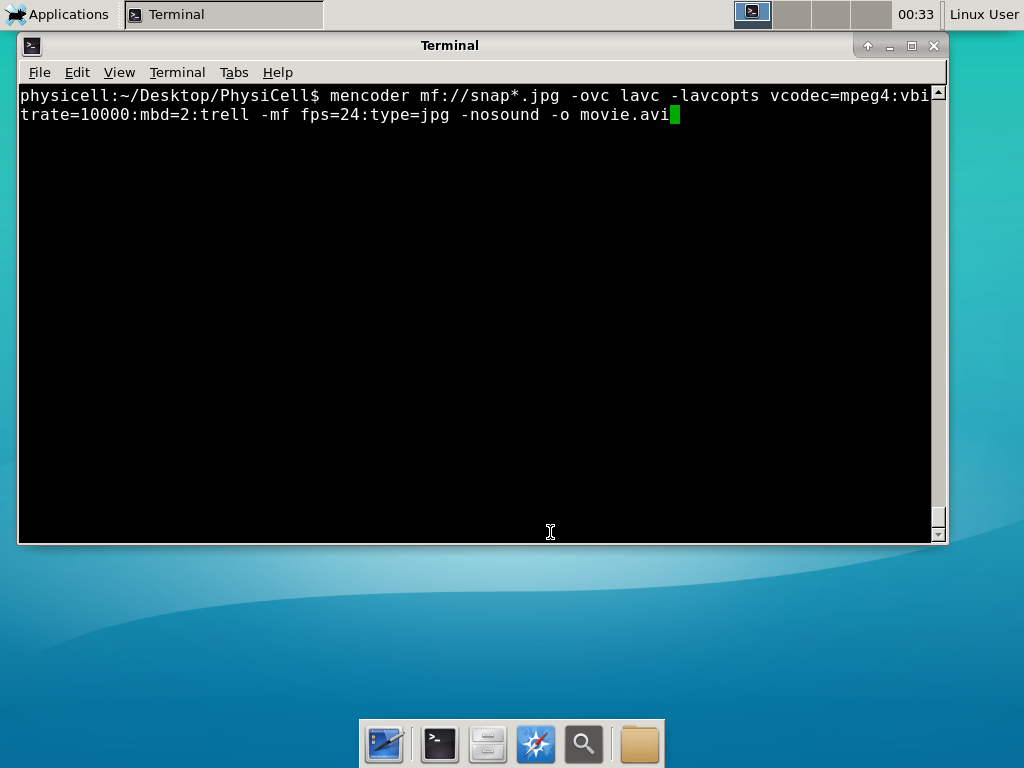
When you’re done, view the movie with mplayer. The options below scale the window to fit within the virtual monitor:
If you want to loop the movie, add “-loop 999” to your command.
7) Get familiar with other tools
Use nano (useage: nano <filename>) to quickly change files at the command line. Hit <control>-O to save your results. Hit <control>-X to exit. <control>-W will search within the file.
Use nedit (useage: nedit <filename> &) to open up one more text files in a graphical editor. This is a good way to edit multiple files at once.
Sometimes, you need to run commands at elevated (admin or root) privileges. Use sudo. Here’s an example, searching the Alpine Linux package manager apk for clang:
physicell:~$ sudo apk search gcc
[sudo] password for physicell:
physicell:~$ sudo apk search clang
clang-analyzer-4.0.0-r0
clang-libs-4.0.0-r0
clang-dev-4.0.0-r0
clang-static-4.0.0-r0
emscripten-fastcomp-1.37.10-r0
clang-doc-4.0.0-r0
clang-4.0.0-r0
physicell:~/Desktop/PhysiCell$
If you want to install clang/llvm (as an alternative compiler):
physicell:~$ sudo apk add gcc
[sudo] password for physicell:
physicell:~$ sudo apk search clang
clang-analyzer-4.0.0-r0
clang-libs-4.0.0-r0
clang-dev-4.0.0-r0
clang-static-4.0.0-r0
emscripten-fastcomp-1.37.10-r0
clang-doc-4.0.0-r0
clang-4.0.0-r0
physicell:~/Desktop/PhysiCell$
Notice that it asks for a password: use the password for root (which is physicell).
8) [Optional] Configure a shared folder
Coming soon.
Why both with zipped source, then?
Given that we can get a whole development environment by just downloading and importing a virtual appliance, why
bother with all the setup of a native development environment, like this tutorial (Windows) or this tutorial (Mac)?
One word: performance. In my testing, I still have not found the performance running inside a
virtual machine to match compiling and running directly on your system. So, the Virtual Appliance is a great
option to get up and running quickly while trying things out, but I still recommend setting up natively with
one of the tutorials I linked in the preceding paragraphs.
What’s next?
In the coming weeks, we’ll post further tutorials on using PhysiCell. In the meantime, have a look at the
PhysiCell project website, and these links as well:
- BioFVM on MathCancer.org: http://BioFVM.MathCancer.org
- BioFVM on SourceForge: http://BioFVM.sf.net
- BioFVM Method Paper in BioInformatics: http://dx.doi.org/10.1093/bioinformatics/btv730
- PhysiCell on MathCancer.org: http://PhysiCell.MathCancer.org
- PhysiCell on Sourceforge: http://PhysiCell.sf.net
- PhysiCell Method Paper (preprint): https://doi.org/10.1101/088773
- PhysiCell tutorials: [click here]
MathCancer C++ Style and Practices Guide
As PhysiCell, BioFVM, and other open source projects start to gain new users and contributors, it’s time to lay out a coding style. We have three goals here:
- Consistency: It’s easier to understand and contribute to the code if it’s written in a consistent way.
- Readability: We want the code to be as readable as possible.
- Reducing errors: We want to avoid coding styles that are more prone to errors. (e.g., code that can be broken by introducing whitespace).
So, here is the guide (revised June 2017). I expect to revise this guide from time to time.
Place braces on separate lines in functions and classes.
I find it much easier to read a class if the braces are on separate lines, with good use of whitespace. Remember: whitespace costs almost nothing, but reading and understanding (and time!) are expensive.
DON’T
class Cell{
public:
 double some_variable;
 bool some_extra_variable;

 Cell(); };

class Phenotype{
public:
 double some_variable;
 bool some_extra_variable;

 Phenotype();
};
DO:
class Cell
{
 public:
     double some_variable;
     bool some_extra_variable;

     Cell();
};

class Phenotype
{
 public:
     double some_variable;
     bool some_extra_variable;

     Phenotype();
};
Enclose all logic in braces, even when optional.
In C/C++, you can omit the curly braces in some cases. For example, this is legal
if( distance > 1.5*cell_radius )
     interaction = false;
force = 0.0; // is this part of the logic, or a separate statement?
error = false;
However, this code is ambiguous to interpret. Moreover, small changes to whitespace–or small additions to the logic–could mess things up here. Use braces to make the logic crystal clear:
DON’T
if( distance > 1.5*cell_radius )
     interaction = false;
force = 0.0; // is this part of the logic, or a separate statement?
error = false;

if( condition1 == true )
  do_something1 = true;
elseif( condition2 == true )
  do_something2 = true;
else
  do_something3 = true;
DO
if( distance > 1.5*cell_radius )
{
     interaction = false;
     force = 0.0;
}
error = false;

if( condition1 == true )
{ do_something1 = true; }
elseif( condition2 == true )
{ do_something2 = true; }
else
{ do_something3 = true; }
Put braces on separate lines in logic, except for single-line logic.
This style rule relates to the previous point, to improve readability.
DON’T
if( distance > 1.5*cell_radius ){
     interaction = false;
     force = 0.0; }

if( condition1 == true ){ do_something1 = true; }
elseif( condition2 == true ){
  do_something2 = true; }
else
{ do_something3 = true; error = true; }
DO
if( distance > 1.5*cell_radius )
{
     interaction = false;
     force = 0.0;
}

if( condition1 == true )
{ do_something1 = true; } // this is fine
elseif( condition2 == true )
{
     do_something2 = true; // this is better
}
else
{
     do_something3 = true;
     error = true;
}
See how much easier that code is to read? The logical structure is crystal clear, and adding more to the logic is simple.
End all functions with a return, even if void.
For clarity, definitively state that a function is done by using return.
DON’T
void my_function( Cell& cell )
{
     cell.phenotype.volume.total *= 2.0;
     cell.phenotype.death.rates[0] = 0.02;
     // Are we done, or did we forget something?
     // is somebody still working here?
}
DO
void my_function( Cell& cell )
{
     cell.phenotype.volume.total *= 2.0;
     cell.phenotype.death.rates[0] = 0.02;
     return;
}
Use tabs to indent the contents of a class or function.
This is to make the code easier to read. (Unfortunately PHP/HTML makes me use five spaces here instead of tabs.)
DON’T
class Secretion
{
 public:
std::vector<double> secretion_rates;
std::vector<double> uptake_rates;
std::vector<double> saturation_densities;
};

void my_function( Cell& cell )
{
cell.phenotype.volume.total *= 2.0;
cell.phenotype.death.rates[0] = 0.02;
return;
}
DO
class Secretion
{
 public:
     std::vector<double> secretion_rates;
     std::vector<double> uptake_rates;
     std::vector<double> saturation_densities;
};

void my_function( Cell& cell )
{
     cell.phenotype.volume.total *= 2.0;
     cell.phenotype.death.rates[0] = 0.02;
     return;
}
Use a single space to indent public and other keywords in a class.
This gets us some nice formatting in classes, without needing two tabs everywhere.
DON’T
class Secretion
{
public:
std::vector<double> secretion_rates;
std::vector<double> uptake_rates;
std::vector<double> saturation_densities;
}; // not enough whitespace

class Errors
{
     private:
          std::string none_of_your_business
     public:
          std::string error_message;
          int error_code;
}; // too much whitespace!
DO
class Secretion
{
 private:
 public:
     std::vector<double> secretion_rates;
     std::vector<double> uptake_rates;
     std::vector<double> saturation_densities;
};

class Errors
{
 private:
     std::string none_of_your_business
 public:
     std::string error_message;
     int error_code;
};
Avoid arcane operators, when clear logic statements will do.
It can be difficult to decipher code with statements like this:
phenotype.volume.fluid=phenotype.volume.fluid<0?0:phenotype.volume.fluid;
Moreover, C and C++ can treat precedence of ternary operators very differently, so subtle bugs can creep in when using the “fancier” compact operators. Variations in how these operators work across languages are an additional source of error for programmers switching between languages in their daily scientific workflows. Wherever possible (and unless there is a significant performance reason to do so), use clear logical structures that are easy to read even if you only dabble in C/C++. Compiler-time optimizations will most likely eliminate any performance gains from these goofy operators.
DON’T
// if the fluid volume is negative, set it to zero
phenotype.volume.fluid=phenotype.volume.fluid<0.0?0.0:pCell->phenotype.volume.fluid;
DO
if( phenotype.volume.fluid < 0.0 )
{
     phenotype.volume.fluid = 0.0;
}
Here’s the funny thing: the second logic is much clearer, and it took fewer characters, even with extra whitespace for readability!
Pass by reference where possible.
Passing by reference is a great way to boost performance: we can avoid (1) allocating new temporary memory, (2) copying data into the temporary memory, (3) passing the temporary data to the function, and (4) deallocating the temporary memory once finished.
DON’T
double some_function( Cell cell )
{
     return = cell.phenotype.volume.total + 3.0;
}
// This copies cell and all its member data!
DO
double some_function( Cell& cell )
{
     return = cell.phenotype.volume.total + 3.0;
}
// This just accesses the original cell data without recopying it.
Where possible, pass by reference instead of by pointer.
There is no performance advantage to passing by pointers over passing by reference, but the code is simpler / clearer when you can pass by reference. It makes code easier to write and understand if you can do so. (If nothing else, you save yourself character of typing each time you can replace “->” by “.”!)
DON’T
double some_function( Cell* pCell )
{
     return = pCell->phenotype.volume.total + 3.0;
}
// Writing and debugging this code can be error-prone.
DO
double some_function( Cell& cell )
{
     return = cell.phenotype.volume.total + 3.0;
}
// This is much easier to write.
Be careful with static variables. Be thread safe!
PhysiCell relies heavily on parallelization by OpenMP, and so you should write functions under the assumption that they may be executed many times simultaneously. One easy source of errors is in static variables:
DON’T
double some_function( Cell& cell )
{
     static double four_pi = 12.566370614359172;
     static double output;
     output = cell.phenotype.geometry.radius;
     output *= output;
     output *= four_pi;
     return output;
}
// If two instances of some_function are running, they will both modify
// the *same copy* of output
DO
double some_function( Cell& cell )
{
     static double four_pi = 12.566370614359172;
     double output;
     output = cell.phenotype.geometry.radius;
     output *= output;
     output *= four_pi;
     return output;
}
// If two instances of some_function are running, they will both modify
// the their own copy of output, but still use the more efficient, once-
// allocated copy of four_pi. This one is safe for OpenMP.
Use std:: instead of “using namespace std”
PhysiCell uses the BioFVM and PhysiCell namespaces to avoid potential collision with other codes. Other codes using PhysiCell may use functions that collide with the standard namespace. So, we formally use std:: whenever using functions in the standard namespace.
DON’T
using namespace std;

cout << "Hi, Mom, I learned to code today!" << endl;
string my_string = "Cheetos are good, but Doritos are better.";
cout << my_string << endl;

vector<double> my_vector;
vector.resize( 3, 0.0 );
DO
std::cout << "Hi, Mom, I learned to code today!" << std::endl;
std::string my_string = "Cheetos are good, but Doritos are better.";
std::cout << my_string << std::endl;

std::vector<double> my_vector;
my_vector.resize( 3, 0.0 );
Camelcase is ugly. Use underscores.
This is purely an aesthetic distinction, but CamelCaseCodeIsUglyAndDoYouUseDNAorDna?
DON’T
double MyVariable1;
bool ProteinsInExosomes;
int RNAtranscriptionCount;

void MyFunctionDoesSomething( Cell& ImmuneCell );
DO
double my_variable1;
bool proteins_in_exosomes;
int RNA_transcription_count;

void my_function_does_something( Cell& immune_cell );
Use capital letters to declare a class. Use lowercase for instances.
To help in readability and consistency, declare classes with capital letters (but no camelcase), and use lowercase for instances of those classes.
DON’T
class phenotype;

class cell
{
 public:
     std::vector<double> position;
     phenotype Phenotype;
};

class ImmuneCell : public cell
{
 public:
     std::vector<double> surface_receptors;
};

void do_something( cell& MyCell , ImmuneCell& immuneCell );

cell Cell;
ImmuneCell MyImmune_cell;

do_something( Cell, MyImmune_cell );
DO
class Phenotype;

class Cell
{
 public:
     std::vector<double> position;
     Phenotype phenotype;
};

class Immune_Cell : public Cell
{
 public:
     std::vector<double> surface_receptors;
};

void do_something( Cell& my_cell , Immune_Cell& immune_cell );

Cell cell;
Immune_Cell my_immune_cell;

do_something( cell, my_immune_cell );
Setting up gcc / OpenMP on OSX (Homebrew edition)
Note: This is part of a series of “how-to” blog posts to help new users and developers of BioFVM and PhysiCell. This guide is for OSX users. Windows users should use this guide instead. A Linux guide is expected soon.
These instructions should get you up and running with a minimal environment for compiling 64-bit C++ projects with OpenMP (e.g., BioFVM and PhysiCell) using gcc. These instructions were tested with OSX 10.11 (El Capitan) and 10.12 (Sierra), but they should work on any reasonably recent version of OSX.
In the end result, you’ll have a compiler and key makefile capabilities. The entire toolchain is free and open source.
Of course, you can use other compilers and more sophisticated integrated desktop environments, but these instructions will get you a good baseline system with support for 64-bit binaries and OpenMP parallelization.
Note 1: OSX / Xcode appears to have gcc out of the box (you can type “gcc” in a Terminal window), but this really just maps back onto Apple’s build of clang. Alas, this will not support OpenMP for parallelization.
Note 2: In this post, we showed how to set up gcc using the popular MacPorts package manager. Because MacPorts builds gcc (and all its dependencies!) from source, it takes a very, very long time. On my 2012 Macbook Air, this step took 16 hours. This tutorial uses Homebrew to dramatically speed up the process!
Note 3: This is an update over the previous version. It incorporates new information that Xcode command line tools can be installed without the full 4.41 GB download / installation of Xcode. Many thanks to Walter de Back and Tim at the Homebrew project for their help!
What you’ll need:
- XCode Command Line Tools: These command line tools are needed for Homebrew and related package managers. Installation instructions are now very simple and included below. As of January 18, 2016, this will install Version 2343.
- Homebrew: This is a package manager for OSX, which will let you easily download and install many linux utilities without building them from source. You’ll particularly need it for getting gcc. Installation is a simple command-line script, as detailed below. As of August 2, 2017, this will download Version 1.3.0.
- gcc (from Homebrew): This will be an up-to-date 64-bit version of gcc, with support for OpenMP. As of August 2, 2017, this will download Version 7.1.0.
Main steps:
1) Install the XCode Command Line Tools
Open a terminal window (Open Launchpad, then “Other”, then “Terminal”), and run:
user$ xcode-select --install
A window should pop up asking you to either get Xcode or install. Choose the “install” option to avoid the huge 4+ GB Xcode download. It should only take a few minutes to complete.
2) Install Homebrew
Open a terminal window (Open Launchpad, then “Other”, then “Terminal”), and run:
user$ ruby -e "$(curl -fsSL https://raw.githubusercontent.com/Homebrew/install/master/install)"
Let the script run, and answer “y” whenever asked. This will not take very long.
3) Get, install, and prepare gcc
Open a terminal window (see above), and search for gcc, version 7.x or above
user$ brew search gcc
You should see a list of packages, including gcc7. (In 2015, this looked like “gcc5”. In 2017, this looks like “gcc@7”.)
Then, download and install gcc:
user$ brew install gcc
This will download whatever dependencies are needed, generally already pre-compiled. The whole process should only take five or ten minutes.
Lastly, you need to get the exact name of your compiler. In your terminal window, type g++, and then hit tab twice to see a list. On my system, I see this:
Pauls-MBA:~ pmacklin$ g++
g++       g++-7     g++-mp-7
Look for the version of g++ without an “mp” (from MacPorts) in its name. In my case, it’s g++-7. Double-check that you have the right one by checking its version. It should look something like this:
Pauls-MBA:~ pmacklin$ g++-7 --version
g++-7 (Homebrew GCC 7.1.0) 7.1.0
Copyright (C) 2017 Free Software Foundation, Inc.
This is free software; see the source for copying conditions.  There is NO warranty; not even
for MERCHANTABILITY or FITNESS FOR A PARTICULAR PURPOSE.
Notice that Homebrew shows up in the information. The correct compiler is g++-7.
PhysiCell Version 1.2.2 and greater use a system variable to record your compiler version, so that you don’t need to modify the CC line in PhysiCell Makefiles. Set the PHYSICELL_CPP variable to record the compiler you just found above. For example, on the bash shell:
export PHYSICELL_CPP=g++-7
echo export PHYSICELL_CPP=g++-7 >> ~/.bash_profile
One last thing: If you don’t update your paths, make will may fail as it continues to combine Apple’s “gcc” toolchain with real gcc. (This seems to happen most often if you installed an older gcc like gcc5 with MacPorts earlier.) You may see errors like this:
user$ make
g++-7 -march=core2 -O3 -fomit-frame-pointer -fopenmp -std=c++11 -c BioFVM_vector.cpp
FATAL:/opt/local/bin/../libexec/as/x86_64/as: I don't understand 'm' flag!
make: *** [BIOFVM_vector.o] Error 1
To avoid this, run:
echo export PATH=/usr/local/bin:$PATH >> ~/.bash_profile
Note that you’ll need to open a new Terminal window for this fix to apply.
4) Test your setup
I wrote a sample C++ program that tests OpenMP parallelization (32 threads). If you can compile and run it, it means that everything (including make) is working! :-)
Make a new directory, and enter it
Open Terminal (see above). You should be in your user profile’s root directory. Make a new subdirectory called GCC_test, and enter it.
mkdir GCC_test
cd GCC_test
Grab a sample parallelized program:
Download a Makefile and C++ source file, and save them to the GCC_test directory. Here are the links:
- Makefile: [click here]
- C++ source: [click here]
Note: The Makefiles in PhysiCell (versions > 1.2.1) can use an environment variable to specify an OpenMP-capable g++ compiler. If you have not yet done so, you should go ahead and set that now, e.g., for the bash shell:
export PHYSICELL_CPP=g++-7
echo export PHYSICELL_CPP=g++-7 >> ~/.bash_profile
Compile and run the test:
Go back to your (still open) command prompt. Compile and run the program:
make
./my_test
The output should look something like this:
Allocating 4096 MB of memory ...
Done!

Entering main loop ...
Done!
Note 1: If the make command gives errors like “**** missing separator”, then you need to replace the white space (e.g., one or more spaces) at the start of the “$(COMPILE_COMMAND)” and “rm -f” lines with a single tab character.
Note 2: If the compiler gives an error like “fatal error: ‘omp.h’ not found”, you probably used Apple’s build of clang, which does not include OpenMP support. You’ll need to make sure that you set the environment variable PHYSICELL_CPP as above (for PhysiCell 1.2.2 or later), or specify your compiler on the CC line of your makefile (for PhysiCell 1.2.1 or earlier).
Now, let’s verify that the code is using OpenMP.
Open another Terminal window. While the code is running, run top. Take a look at the performance, particularly CPU usage. While your program is running, you should see CPU usage fairly close to ‘100% user’. (This is a good indication that your code is running the OpenMP parallelization as expected.)
What’s next?
Download a copy of PhysiCell and try out the included examples! Visit BioFVM at MathCancer.org.
- PhysiCell links:
- PhysiCell Method Paper at bioRxiv: https://doi.org/10.1101/088773
- PhysiCell on MathCancer: http://PhysiCell.MathCancer.org
- PhysiCell on SourceForge: http://PhysiCell.sf.net
- PhysiCell on github: http://github.com/MathCancer/PhysiCell
- PhysiCell tutorials: [click here]
- BioFVM links:
- BioFVM announcement on this blog: [click here]
- BioFVM on MathCancer.org: http://BioFVM.MathCancer.org
- BioFVM on SourceForge: http://BioFVM.sf.net
- BioFVM Method Paper in BioInformatics: http://dx.doi.org/10.1093/bioinformatics/btv730
- BioFVM tutorials: [click here]
Setting up gcc / OpenMP on OSX (Homebrew edition) (outdated)
Note 1: This is the part of a series of “how-to” blog posts to help new users and developers of BioFVM and PhysiCell. This guide is for OSX users. Windows users should use this guide instead. A Linux guide is expected soon.
Note 2: This tutorial is outdated. Please see this updated version.
These instructions should get you up and running with a minimal environment for compiling 64-bit C++ projects with OpenMP (e.g., BioFVM and PhysiCell) using gcc. These instructions were tested with OSX 10.11 (El Capitan), but they should work on any reasonably recent version of OSX.
In the end result, you’ll have a compiler and key makefile capabilities. The entire toolchain is free and open source.
Of course, you can use other compilers and more sophisticated integrated desktop environments, but these instructions will get you a good baseline system with support for 64-bit binaries and OpenMP parallelization.
Note 3: OSX / Xcode appears to have gcc out of the box (you can type “gcc” in a Terminal window), but this really just maps back onto Apple’s build of clang. Alas, this will not support OpenMP for parallelization.
Note 4: Yesterday in this post, we showed how to set up gcc using the popular MacPorts package manager. Because MacPorts builds gcc (and all its dependencies!) from source, it takes a very, very long time. On my 2012 Macbook Air, this step took 16 hours. This tutorial uses Homebrew to dramatically speed up the process!
What you’ll need:
- XCode: This includes command line development tools. Evidently, it is required for both Homebrew and its competitors (e.g., MacPorts). Download the latest version in the App Store. (Search for xcode.) As of January 15, 2016, the App Store will install Version 7.2. Please note that this is a 4.41 GB download!
- Homebrew: This is a package manager for OSX, which will let you easily download and install many linux utilities without building them from source. You’ll particularly need it for getting gcc. Installation is a simple command-line script, as detailed below. As of January 17, 2016, this will download Version 0.9.5.
- gcc5 (from Homebrew): This will be an up-to-date 64-bit version of gcc, with support for OpenMP. As of January 17, 2016, this will download Version 5.2.0.
Main steps:
1) Download, install, and prepare XCode
As mentioned above, open the App Store, search for Xcode, and start the download / install. Go ahead and grab a coffee while it’s downloading and installing 4+ GB. Once it has installed, open Xcode, agree to the license, and let it install whatever components it needs.
Now, you need to get the command line tools. Go to the Xcode menu, select “Open Developer Tool”, and choose “More Developer Tools …”. This will open up a site in Safari and prompt you to log in.
Sign on with your AppleID, agree to yet more licensing terms, and then search for “command line tools” for your version of Xcode and OSX. (In my case, this is OSX 10.11 with Xcode 7.2) Click the + next to the correct version, and then the link for the dmg file. (Command_Line_Tools_OS_X_10.11_for_Xcode_7.2.dmg).
Double-click the dmg file. Double-click pkg file it contains. Click “continue”, “OK”, and “agree” as much as it takes to install. Once done, go ahead and exit the installer and close the dmg file.
2) Install Homebrew
Open a terminal window (Open Launchpad, then “Other”, then “Terminal”), and run:
> ruby -e "$(curl -fsSL https://raw.githubusercontent.com/Homebrew/install/master/install)"
Let the script run, and answer “y” whenever asked. This will not take very long.
3) Get, install, and prepare gcc
Open a terminal window (see above), and search for gcc, version 5.x or above
> brew search gcc5
You should see a list of packages, including gcc5. Take a note of what is found. (In my case, it found homebrew/versions/gcc5.)
Then, download and install gcc5:
> brew install homebrew/versions/gcc5
This will download whatever dependencies are needed, generally already pre-compiled. The whole process should only take five or ten minutes.
Lastly, you need to get the exact name of your compiler. In your terminal window, type g++, and then hit tab twice to see a list. On my system, I see this:
Pauls-MBA:~ pmacklin$ g++
g++       g++-5       g++-mp-5
Look for the version of g++ without an “mp” (for MacPorts) in its name. In my case, it’s g++-5. Double-check that you have the right one by checking its version. It should look something like this:
Pauls-MBA:~ pmacklin$ g++-5 --version
g++-5 (Homebrew gcc5 5.2.0) 5.2.0
Copyright (C) 2015 Free Software Foundation, Inc.
This is free software; see the source for copying conditions.  There is NO warranty; not even
for MERCHANTABILITY or FITNESS FOR A PARTICULAR PURPOSE.
Notice that Homebrew shows up in the information. The correct compiler is g++-5.
5) Test the compiler
Write a basic parallelized program:
Open Terminal (see above). You should be in your user profile’s root directory. Make a new subdirectory, enter it, and create a new file:
> mkdir omp_test
> cd omp_test
> nano omp_test.cpp
Then, write your basic OpenMP test:
#include <iostream>
#include <cmath>
#include <vector>
#include <omp.h>
int main( int argc, char* argv[] )
{
	omp_set_num_threads( 8 );

	double pi = acos( -1.0 );

	std::cout << "Allocating memory ..." << std::endl;
	std::vector<double> my_vector( 128000000, 0.0 );
	std::cout << "Done!" << std::endl << std::endl;

	std::cout << "Entering main loop ... " << std::endl;

	#pragma omp parallel for
	for( int i=0; i < my_vector.size(); i++ )
	{
		my_vector[i] = exp( -sin( i*i + pi*log(i+1) ) );
	}
	std::cout << "Done!" << std::endl;

	return 0;
}
Save the file (as omp_test.cpp). (In nano, use [Control]+X, Y, and then confirm the choice of filename.)
In the omp_set_num_threads() line above, replace 8 with the maximum number of virtual processors on your CPU. (For a quad-core CPU with hyperthreading, this number is 8. On a hex-core CPU without hyperthreading, this number is 6.) If in doubt, leave it alone for now.
Write a makefile:
Next, create a Makefile to start editing:
> nano Makefile
Add the following contents:
CC := g++-5
# replace this with your correct compiler as identified above

ARCH := core2 # Replace this with your CPU architecture.
# core2 is pretty safe for most modern machines.

CFLAGS := -march=$(ARCH) -O3 -fopenmp -m64 -std=c++11

COMPILE_COMMAND := $(CC) $(CFLAGS)

OUTPUT := my_test

all: omp_test.cpp
	$(COMPILE_COMMAND) -o $(OUTPUT) omp_test.cpp

clean:
	rm -f *.o $(OUTPUT).*
Go ahead and save this (as Makefile). ([Control]-X, Y, confirm the filename.)
Compile and run the test:
Go back to your (still open) command prompt. Compile and run the program:
> make
> ./my_test
The output should look something like this:
Allocating memory ...
Done!
Entering main loop ...
Done!
Note 1: If the make command gives errors like “**** missing separator”, then you need to replace the white space (e.g., one or more spaces) at the start of the “$(COMPILE_COMMAND)” and “rm -f” lines with a single tab character.
Note 2: If the compiler gives an error like “fatal error: ‘omp.h’ not found”, you probably used Apple’s build of clang, which does not include OpenMP support. You’ll need to make sure that you specify your compiler on the CC line of your makefile.
Now, let’s verify that the code is using OpenMP.
Open another Terminal window. While the code is running, run top. Take a look at the performance, particularly CPU usage. While your program is running, you should see CPU usage fairly close to ‘100% user’. (This is a good indication that your code is running the OpenMP parallelization as expected.)
What’s next?
Download a copy of BioFVM and try out the included examples! Visit BioFVM at MathCancer.org.
- BioFVM announcement on this blog: [click here]
- BioFVM on MathCancer.org: http://BioFVM.MathCancer.org
- BioFVM on SourceForge: http://BioFVM.sf.net
- BioFVM Method Paper in BioInformatics: http://dx.doi.org/10.1093/bioinformatics/btv730
- BioFVM tutorials: [click here]
Setting up gcc / OpenMP on OSX (MacPorts edition)
Note: This is the part of a series of “how-to” blog posts to help new users and developers of BioFVM and PhysiCell. This guide is for OSX users. Windows users should use this guide instead. A Linux guide is expected soon.
These instructions should get you up and running with a minimal environment for compiling 64-bit C++ projects with OpenMP (e.g., BioFVM and PhysiCell) using gcc. These instructions were tested with OSX 10.11 (El Capitan), but they should work on any reasonably recent version of OSX.
In the end result, you’ll have a compiler and key makefile capabilities. The entire toolchain is free and open source.
Of course, you can use other compilers and more sophisticated integrated desktop environments, but these instructions will get you a good baseline system with support for 64-bit binaries and OpenMP parallelization.
Note 1: OSX / Xcode appears to have gcc out of the box (you can type “gcc” in a Terminal window), but this really just maps back onto Apple’s build of clang. Alas, this will not support OpenMP for parallelization.
Note 2: This process is somewhat painful because MacPorts compiles everything from source, rather than using pre-compiled binaries. This tutorial uses Homebrew: a newer package manager that uses pre-compiled binaries to dramatically speed up the process. I highly recommend using the Homebrew version of this tutorial.
What you’ll need:
- XCode: This includes command line development tools. Evidently, it is required for both Macports and its competitors (e.g., Homebrew). Download the latest version in the App Store. (Search for xcode.) As of January 15, 2016, the App Store will install Version 7.2. Please note that this is a 4.41 GB download!
- MacPorts: This is a package manager for OSX, which will let you easily download, build and install many linux utilities. You’ll particularly need it for getting gcc. Download the latest installer (MacPorts-2.3.4-10.11-ElCapitan.pkg) here. As of August 2, 2017, this will download Version 2.4.1.
- gcc7 (from MacPorts): This will be an up-to-date 64-bit version of gcc, with support for OpenMP. As of August 2, 2017, this will download Version 7.1.1.
Main steps:
1) Download, install, and prepare XCode
As mentioned above, open the App Store, search for Xcode, and start the download / install. Go ahead and grab a coffee while it’s downloading and installing 4+ GB. Once it has installed, open Xcode, agree to the license, and let it install whatever components it needs.
Now, you need to get the command line tools. Go to the Xcode menu, select “Open Developer Tool”, and choose “More Developer Tools …”. This will open up a site in Safari and prompt you to log in.
Sign on with your AppleID, agree to yet more licensing terms, and then search for “command line tools” for your version of Xcode and OSX. (In my case, this is OSX 10.11 with Xcode 7.2) Click the + next to the correct version, and then the link for the dmg file. (Command_Line_Tools_OS_X_10.11_for_Xcode_7.2.dmg).
Double-click the dmg file. Double-click pkg file it contains. Click “continue”, “OK”, and “agree” as much as it takes to install. Once done, go ahead and exit the installer and close the dmg file.
2) Install Macports
Double-click the MacPorts pkg file you downloaded above. OSX may complain with a message like this:
“MacPorts-2.4.1-10.11-ElCapitan.pkg” can’t be opened because it is from an unidentified developer.
If so, follow the directions here.
Leave all the default choices as they are in the installer. Click OK a bunch of times. The package scripts might take awhile.
Open a terminal window (Open Launchpad, then “Other”, then “Terminal”), and run:
sudo port -v selfupdate
to make sure that everything is up-to-date.
3) Get, install, and prepare gcc
Open a terminal window (see above), and search for gcc, version 7.x or above
port search gcc7
You should see a list of packages, including gcc7.
Then, download, build and install gcc7:
sudo port install gcc7
You should see a list of packages, including gcc7.
This will download, build, and install any dependencies necessary for gcc7, including llvm and many, many other things. This takes even longer than the 4.4 GB download of Xcode. Go get dinner and a coffee. You may well need to let this run overnight. (On my 2012 Macbook Air, it required 16 hours to fully build gcc7 and its dependencies in a prior tutorial. We’ll discuss this point further below.)
Lastly, you need to get the exact name of your compiler. In your terminal window, type g++, and then hit tab twice to see a list. On my system, I see this:
Pauls-MBA:~ pmacklin$ g++
g++       g++-mp-7
Look for the version of g++ with an “mp” in its name. In my case, it’s g++-mp-7. Double-check that you have the right one by checking its version. It should look something like this:
Pauls-MBA:~ pmacklin$ g++-mp-7 --version

g++-mp-7 (MacPorts gcc7 7-20170622_0) 7.1.1 20170622
Copyright (C) 2017 Free Software Foundation, Inc.
This is free software; see the source for copying conditions.  There is NO warranty; not even
for MERCHANTABILITY or FITNESS FOR A PARTICULAR PURPOSE.
Notice that MacPorts shows up in the information. The correct compiler is g++-mp-7.
PhysiCell Version 1.2.2 and greater use a system variable to record your compiler version, so that you don’t need to modify the CC line in PhysiCell Makefiles. Set the PHYSICELL_CPP variable to record the compiler you just found above. For example, on the bash shell:
export PHYSICELL_CPP=g++-mp-7
echo export PHYSICELL_CPP=g++-mp-7 >> ~/.bash_profile
4) Test your setup
I wrote a sample C++ program that tests OpenMP parallelization (32 threads). If you can compile and run it, it means that everything (including make) is working! :-)
Make a new directory, and enter it
Open Terminal (see above). You should be in your user profile’s root directory. Make a new subdirectory called GCC_test, and enter it.
mkdir GCC_test
cd GCC_test
Grab a sample parallelized program:
Download a Makefile and C++ source file, and save them to the GCC_test directory. Here are the links:
- Makefile: [click here]
- C++ source: [click here]
Note: The Makefiles in PhysiCell (versions > 1.2.1) can use an environment variable to specify an OpenMP-capable g++ compiler. If you have not yet done so, you should go ahead and set that now, e.g., for the bash shell:
export PHYSICELL_CPP=g++-mp-7
echo export PHYSICELL_CPP=g++-mp-7 >> ~/.bash_profile
Compile and run the test:
Go back to your (still open) command prompt. Compile and run the program:
make
./my_test
The output should look something like this:
Allocating 4096 MB of memory ...
Done!

Entering main loop ...
Done!
Note 1: If the make command gives errors like “**** missing separator”, then you need to replace the white space (e.g., one or more spaces) at the start of the “$(COMPILE_COMMAND)” and “rm -f” lines with a single tab character.
Note 2: If the compiler gives an error like “fatal error: ‘omp.h’ not found”, you probably used Apple’s build of clang, which does not include OpenMP support. You’ll need to make sure that you set the environment variable PHYSICELL_CPP as above (for PhysiCell 1.2.2 or later), or specify your compiler on the CC line of your makefile (for PhysiCell 1.2.1 or earlier).
Now, let’s verify that the code is using OpenMP.
Open another Terminal window. While the code is running, run top. Take a look at the performance, particularly CPU usage. While your program is running, you should see CPU usage fairly close to ‘100% user’. (This is a good indication that your code is running the OpenMP parallelization as expected.)
MacPorts and Pain
MacPorts builds all the tools from source. While this ensures that you get very up-to-date binaries, it is very, very slow!
However, all hope is not lost. It turns out that Homebrew will install pre-compiled binaries, so the 16-hour process of installing gcc is reduced to about 5-10 minutes. Check back tomorrow for a follow-up tutorial on how to use Homebrew to set up gcc.
What’s next?
Download a copy of PhysiCell and try out the included examples! Visit BioFVM at MathCancer.org.
- PhysiCell links:
- PhysiCell Method Paper at bioRxiv: https://doi.org/10.1101/088773
- PhysiCell on MathCancer: http://PhysiCell.MathCancer.org
- PhysiCell on SourceForge: http://PhysiCell.sf.net
- PhysiCell on github: http://github.com/MathCancer/PhysiCell
- PhysiCell tutorials: [click here]
- BioFVM links:
- BioFVM announcement on this blog: [click here]
- BioFVM on MathCancer.org: http://BioFVM.MathCancer.org
- BioFVM on SourceForge: http://BioFVM.sf.net
- BioFVM Method Paper in BioInformatics: http://dx.doi.org/10.1093/bioinformatics/btv730
- BioFVM tutorials: [click here]
Setting up a 64-bit gcc/OpenMP environment on Windows
Note: This is the part of a series of “how-to” blog posts to help new users and developers of BioFVM and PhysiCell. This guide is for Windows users. OSX users should use this guide for Homebrew (preferred method) or this guide for MacPorts (much slower but reliable). A Linux guide is expected soon.
These instructions should get you up and running with a minimal environment for compiling 64-bit C++ projects with OpenMP (e.g., BioFVM and PhysiCell) using a 64-bit Windows port of gcc. These instructions should work for any modern Windows installation, say Windows 7 or above. This tutorial assumes you have a 64-bit CPU running on a 64-bit operating system.
In the end result, you’ll have a compiler, key makefile capabilities, and a decent text editor. The entire toolchain is free and open source.
Of course, you can use other compilers and more sophisticated integrated desktop environments, but these instructions will get you a good baseline system with support for 64-bit binaries and OpenMP parallelization.
What you’ll need:
- MinGW-w64 compiler: This is a native port of the venerable gcc compiler for windows, with support for 64-bit executables. Download the latest installer (mingw-w64-install.exe) here. As of February 3, 2020, this installer will download gcc 8.1.0.
- MSYS tools: This gets you some of the common command-line utilities from Linux, Unix, and BSD systems (make, touch, etc.). Download the latest installer (mingw-get-setup.exe) here.
- Notepad++ text editor: This is a full-featured text editor for Windows, including syntax highlighting, easy commenting, tabbed editing, etc. Download the latest version here. As of February 3, 2020, this will download Version 7.8.4.
Main steps:
1) Install the compiler
Run the mingw-w64-install.exe. When asked, select:
Version: 8.1.0 (or later)
Architecture: x86_64
Threads: posix (switched to posix to support PhysiBoSS)
Exception: seh (While sjlj works and should be more compatible with various GNU tools, the native SEH should be faster.)
Build version: 0 (or the default)
Leave the destination folder wherever the installer wants to put it. In my case, it is:
C:\Program Files\mingw-w64\x86_64-8.1.0-posix-seh-rt_v6-rev0
Let MinGW-w64 download and install whatever it needs.
2) Install the MSYS tools
Run mingw-get-setup.exe. Leave the default installation directory and any other defaults on the initial screen. Click “continue” and let it download what it needs to get started. (a bunch of XML files, for the most part.) Click “Continue” when it’s done.
This will open up a new package manager. Our goal here is just to grab MSYS, rather than the full (but merely 32-bit) compiler. Scroll through and select (“mark for installation”) the following:
- mingw-developer-toolkit. (Note: This should automatically select msys-base.)
Next, click “Apply Changes” in the “Installation” menu. When prompted, click “Apply.” Let the package manager download and install what it needs (on the order of 95 packages). Go ahead and close things once the installation is done, including the package manager.
3) Install the text editor
Run the Notepad++ installer. You can stick with the defaults.
4) Add these tools to your system path
Adding the compiler, text editor, and MSYS tools to your path helps you to run make files from the compiler. First, get the path of your compiler:
- Open Windows Explorer ( [Windows]+E )
- Browse through C:\, then Program Files, mingw-w64, then a messy path name corresponding to our installation choices (in my case, x86_64-8.1.0-posix-seh_rt_v6-rev0), then mingw64, and finally bin.
- Record your answer. For me, it’s
C:\Program Files\mingw-w64\x86_64-8.1.0-posix-seh-rt_v6-rev0\mingw64\bin\
Then, get the path to Notepad++.
- Go back to Explorer, and choose “This PC” or “My Computer” from the left column.
- Browse through C:\, then Program Files (x86), then Notepad++.
- Copy the path from the Explorer address bar.
- Record your answer. For me, it’s
c:\Program Files (x86)\Notepad++\
Then, get the path for MSYS:
- Go back to Explorer, and choose “This PC” or “My Computer” from the left column.
- Browse through C:\, then MinGW, then msys, then 1.0, and finally bin.
- Copy the path from the Explorer address bar.
- Record your answer. For me, it’s
C:\MinGW\msys\1.0\bin\
Lastly, add these paths to the system path, as in this tutorial. (Note that later versions of the mingw-w64 installer might already automatically update your path.)
5) Test your setup
I wrote a sample C++ program that tests OpenMP parallelization (32 threads). If you can compile and run it, it means that everything (including make) is working! :-)
Make a new directory, and enter it
Enter a command prompt ( [windows]+R, then cmd ). You should be in your user profile’s root directory. Make a new subdirectory, called GCC_test, and enter it.
mkdir GCC_test
cd GCC_test
Grab a sample parallelized program:
Download a Makefile and C++ source file, and save them to the GCC_test directory. Here are the links:
- Makefile: [click here]
- C++ source: [click here]
Compile and run the test:
Go back to your (still open) command prompt. Compile and run the program:
make
my_test
The output should look something like this:
Allocating 4096 MB of memory ...
Done!

Entering main loop ...
Done!
Open up the Windows task manager ([windows]+R, taskmgr) while the code is running. Take a look at the performance tab, particularly the graphs of the CPU usage history. While your program is running, you should see all your virtual processes 100% utilized, unless you have more than 32 virtual CPUs. (This is a good indication that your code is running the OpenMP parallelization as expected.)
Note: If the make command gives errors like “**** missing separator”, then you need to replace the white space (e.g., one or more spaces) at the start of the “$(COMPILE_COMMAND)” and “rm -f” lines with a single tab character.
What’s next?
Download a copy of PhysiCell and try out the included examples! Visit BioFVM at MathCancer.org.
- PhysiCell links:
- PhysiCell Method Paper at bioRxiv: https://doi.org/10.1101/088773
- PhysiCell on MathCancer: http://PhysiCell.MathCancer.org
- PhysiCell on SourceForge: http://PhysiCell.sf.net
- PhysiCell on github: http://github.com/MathCancer/PhysiCell
- PhysiCell tutorials: [click here]
- BioFVM links:
- BioFVM announcement on this blog: [click here]
- BioFVM on MathCancer.org: http://BioFVM.MathCancer.org
- BioFVM on SourceForge: http://BioFVM.sf.net
- BioFVM Method Paper in BioInformatics: http://dx.doi.org/10.1093/bioinformatics/btv730
- BioFVM tutorials: [click here]